
Why Color Negatives Turn Blue When Inverted: The Math of C-41 Orange Mask Subtraction
Every inversion tool that gives you blue faces made the same mistake: it treated a density-domain problem as a linear one. Here is the derivation, and the shader.
Load a camera scan into any generic photo editor or basic film scanner app, hit *invert*, and the faces come back cyan. The usual diagnosis — "the white balance is off" — is wrong, and that is why chasing it with the temperature slider never quite lands. The cast is baked into the film on purpose, and removing it is a division, not a subtraction.
1. Why the film base is orange at all
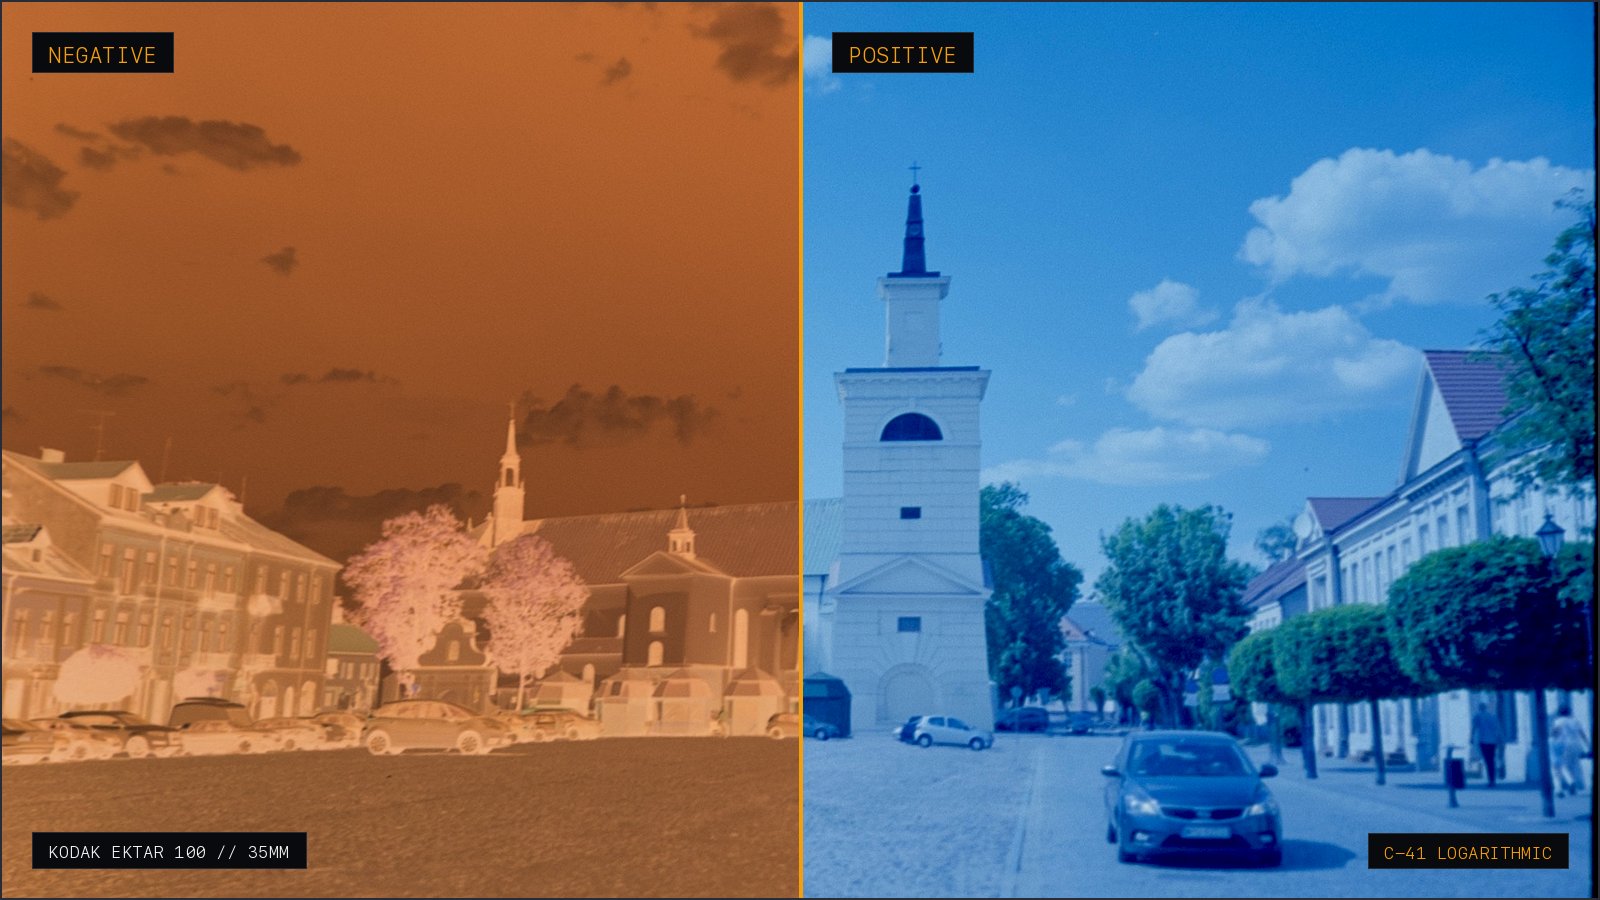
The cyan and magenta dyes in a colour negative are not spectrally pure: each absorbs light in bands it should ignore. Left alone, that unwanted absorption contaminates every colour reproduced from the negative. Kodak's fix, standard across C-41, is colored couplers — the unused coupler stays yellow-orange and forms a positive mask of exactly the contamination it is compensating for. The orange you see is a built-in correction filter, not a defect.
The consequence
A processed C-41 negative is deliberately non-neutral. Any inversion that assumes a neutral base is solving the wrong equation before it starts.
2. The linear trap: 1 − RGB
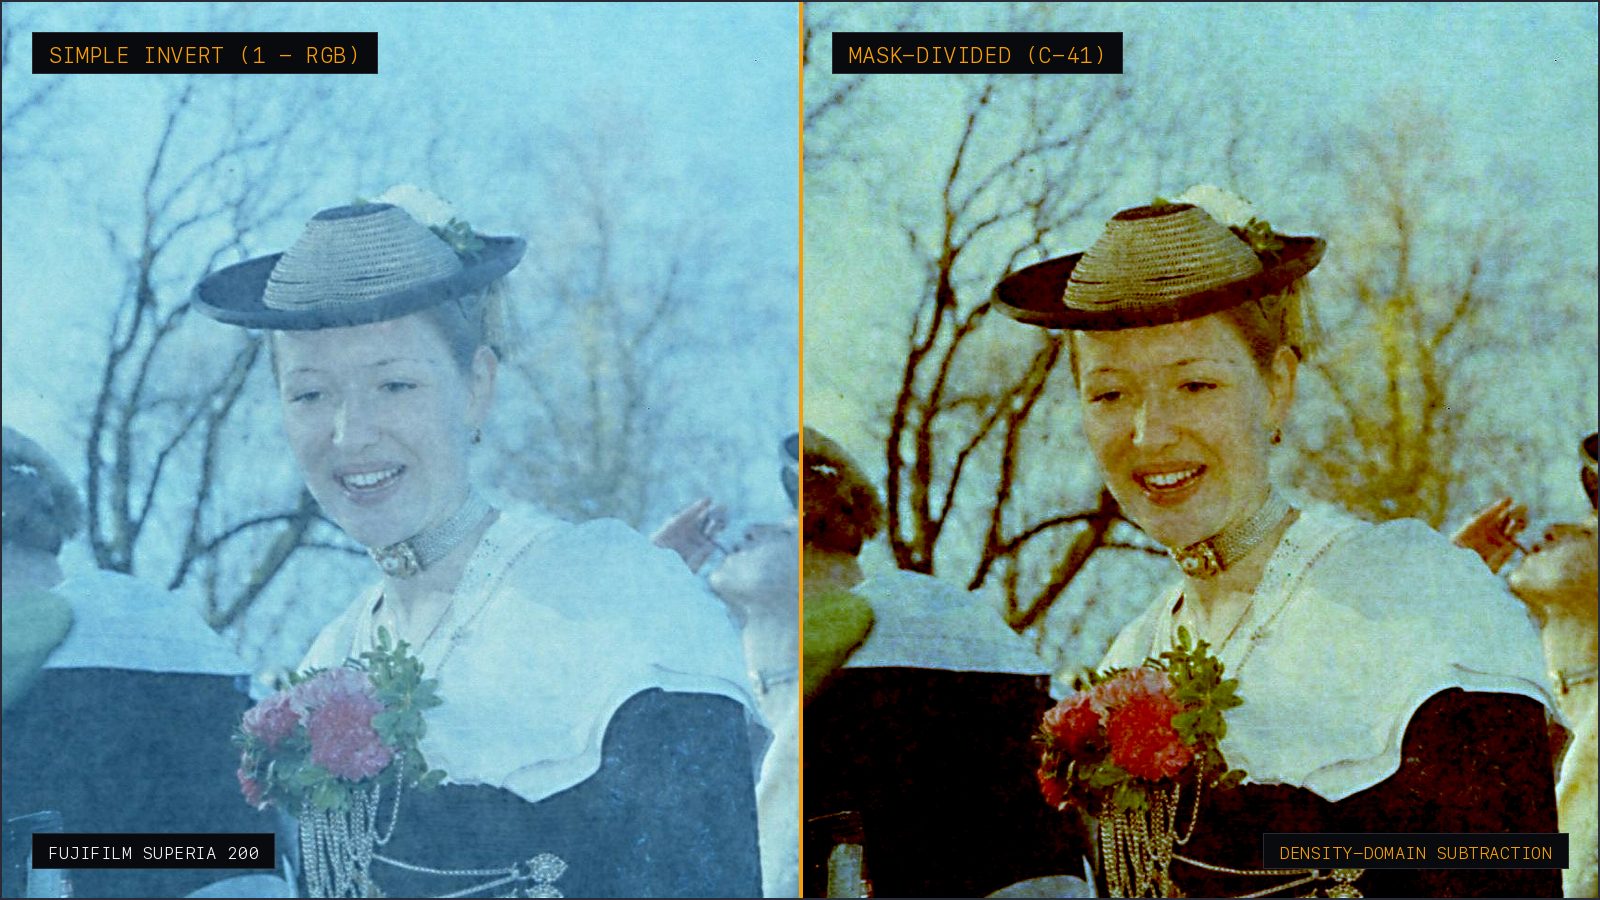
Film responds to light exponentially. Optical density is D = log₁₀(1 / T) where T is transmittance, and the emulsion's answer to exposure is linear in *density*, not in transmittance. Inverting an 8-bit sRGB value with 255 - x inverts transmittance, so the orange bias survives — inverted into cyan — while the shadows, which occupy the compressed end of the transmittance scale, clip into a flat navy block.
3. Subtracting the mask in density space
In density space, removing the base is a plain subtraction: D_image = D_pixel − D_base. Exponentiate both sides and subtraction becomes division — T_image = T_pixel / T_base — which is why the shader divides by a sampled mask colour instead of subtracting it. One power function then restores the emulsion's non-linear response.
vec3 inverted = pow(max(vec3(0.0), 1.0 - (pixel / mask)), vec3(u_filmCurve));
inverted = clamp((inverted - u_black) / (u_white - u_black), 0.0, 1.0);
inverted = pow(inverted, vec3(1.0 / u_gamma));
pixel / mask— density-domain subtraction of the orange base.u_filmCurve(≈1.45–1.60) — restores the S-shaped emulsion response instead of a flat ramp.u_black/u_white— level stretch, so the histogram fills the range without clipping.u_gamma(1.8) — compensates the display transfer function; without it midtones sit dark and muddy.
4. Getting `mask` right: 40×40 with outlier rejection
The whole correction rests on one number per channel, so a single dusty pixel would poison the frame. As with the step-by-step workflow for how to invert film negatives at home, picking a clean unexposed base sample is critical: NegaScan averages a 40×40 patch of unexposed base — the sprocket gap or the strip between frames — and rejects samples beyond 1.5 standard deviations before averaging, which removes grain spikes, dust and scratches without hand-masking.
5. Run it yourself
The same shader that ships in the workbench, running on your GPU. Drag the divider; drop in your own negative to see how your stock behaves.
If an inversion tool cannot tell you which pixels it used as the film base, it is guessing — and you will be correcting its guess on every frame.
Technical FAQ
- Why does inverted color negative film look so blue or cyan?
- C-41 negative film incorporates yellow and magenta masking dyes into the emulsion to compensate for unwanted dye absorption. When inverted with simple linear math (255 - RGB), this orange base turns complementary cyan-blue and contaminates midtones, particularly skin.
- Can I fix the orange film mask using Lightroom's white balance temperature slider?
- No. White balance adjusts linear RGB ratios, whereas the orange mask is an optical density offset across an exponential curve. Pulling the temperature slider warms the shadows and highlights unevenly without neutralizing the nonlinear color cast.
- Where on the film strip should I sample the base color for mask subtraction?
- Sample from an unexposed area of the film border, such as the clear gap between frames or around the sprocket holes on 35mm film. Avoid sampling inside exposed frame edges or areas clouded by flare from your backlight.
- Does black and white negative film have an orange mask?
- No, black and white negatives use silver halide crystals on a clear or lightly tinted gray acetate base. Because they do not use chromogenic dye couplers, they only require a simple tone inversion and level stretch without mask division.
Keep reading
- How to Transfer Disposable Camera (QuickSnap) Photos to Phone Without Paying Lab FeesFinished a Fujifilm QuickSnap or disposable camera? Learn where to develop it, why stores charge $15+ for smartphone scans, and how to get develop-only negatives and scan them to your phone at home.
- How to Invert Film Negatives on Phone Without a $48/Year Subscription (Best Film Scanner Apps 2026)A comprehensive review of mobile film scanner apps. Exposing the predatory weekly subscription traps of FilmBox and Photomyne, and comparing one-time buyout alternatives like NegaScan.